*UPDATE*
Since posting this, I've actually begun using the "height blend" node, to perform this function. You could argue my method gives a (tiny)bit more control, but is ultimately inferior in terms of usage and really opens up the door to messy height values. Instead, I suggest taking a look into the "height blend" node as it does pretty much the same thing, but cleaner, simpler, and even outputs a very handy binary mask. I'll leave this here tho for anyone who still wants it.
____________________________________________________________________________________________________________________________________
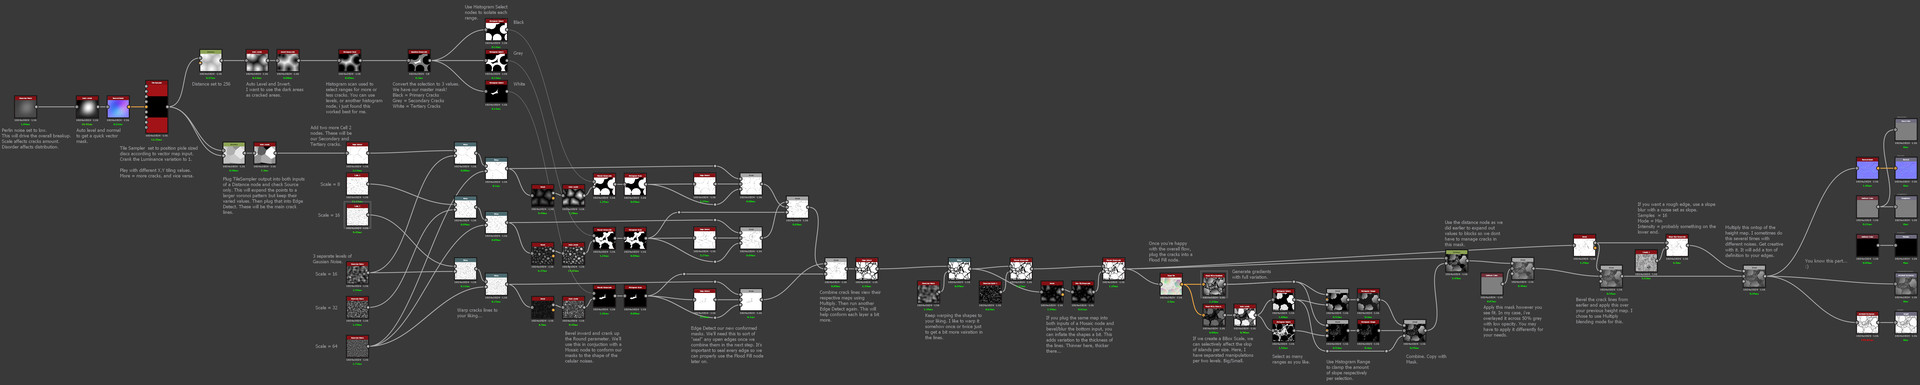
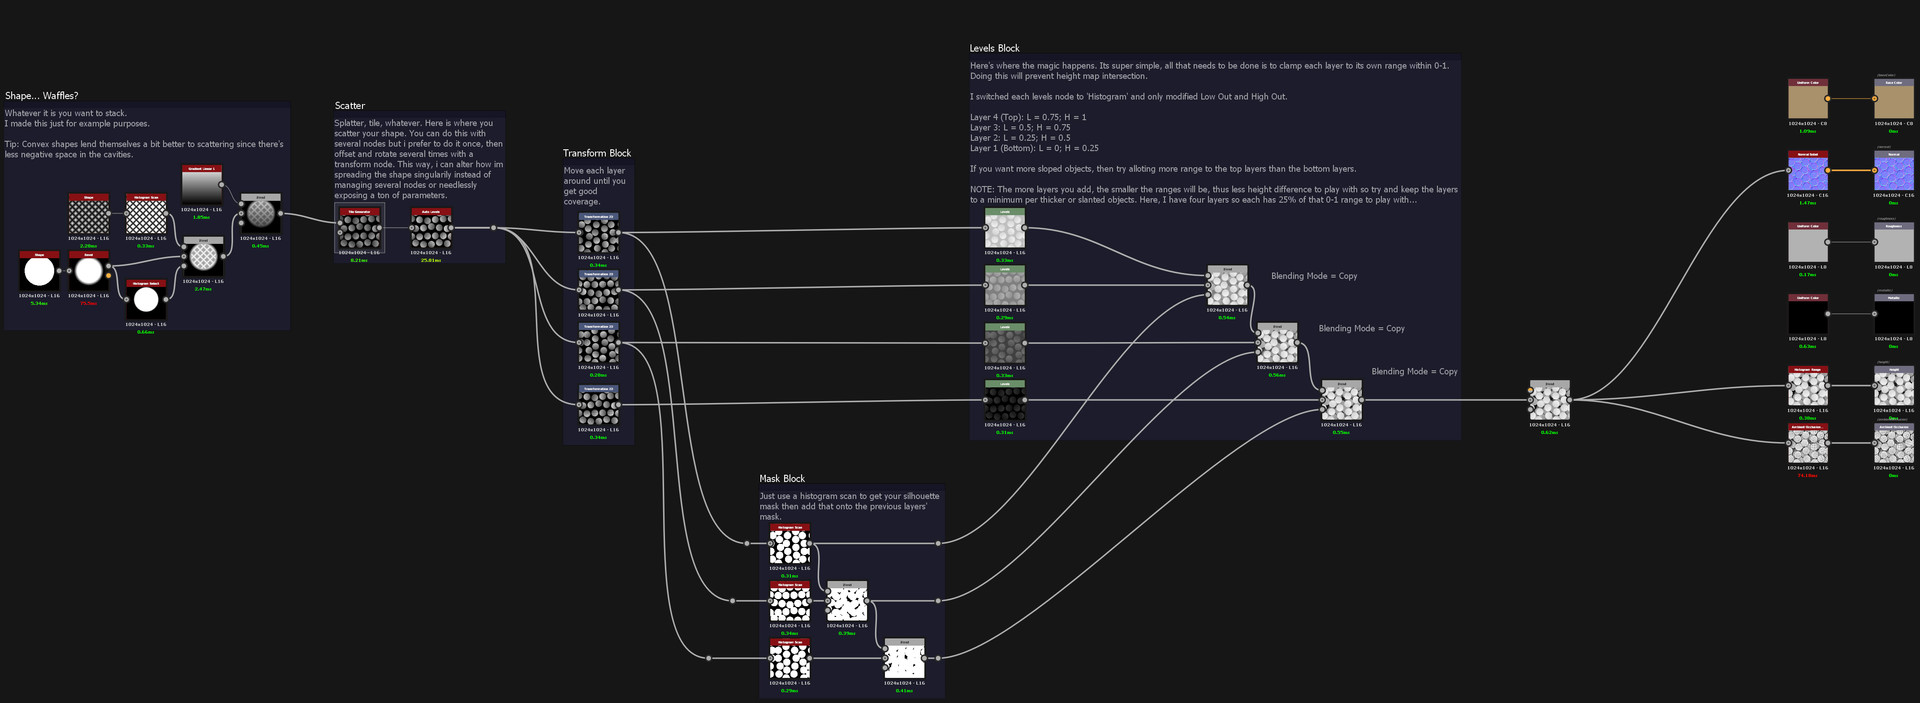
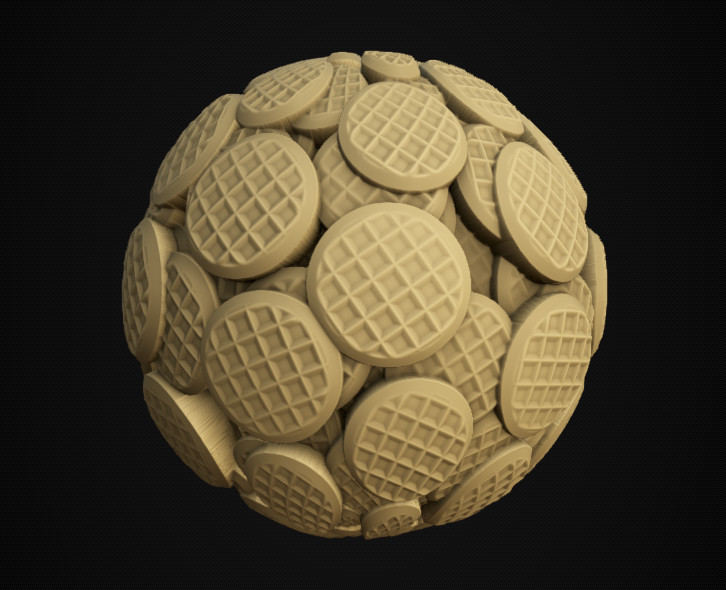
So, here's how I went about stacking the cassettes in my Videocassette Substance.
Here's a graph that explains my process. This is so far the best way I've seen it done. Hope this helps!
More thoughts:
- Some objects, like my videocassettes needed to be scattered after I had created height, normal, rgb... So, instead of running the above graph per each of those maps (which would be insane) I packed channels as much as possible and was able to perform the above with only two RGBA maps instead of 6, then extracted the results from each after.
- You could run the top layer through a Flood Fill node to create a value/color mask to mask out an object here and there. This would be a great way to keep it from looking too grid-like.
- By allocating more height range towards the upper layers, you can allow for more tilting to create a more uneven surface.
- You're pretty much always going to get a lil bit of clipping depth-wise but that's just the nature of height maps. A way you might get around that is by filling the negative space with something..... maybe some syrup? Whipped cream? Fruit? :P